You will need:
* velcro or heavy duty snap and tools (I put velcro closure on mine)
* 2 fabric colors, about 1/2 yard total
* interfacing 1/4 yard
* 7" zipper
*zipperfoot
Step 1: Cut Out The Fabric Pieces
Step 2: Preparing The Zipper Area
Take one of the Main Color 8.5" x 4.5" pieces. On the wrong side, draw a line in pencil 1″ from the top. It should end 1″ from each edge. Draw an identical line 1/2″ below the first one, and connect them at the ends. This will be the square into which your zipper will be inserted.
Place a Secondary Color 8.5″ x 4.5″ piece underneath the piece you just drew on, right sides facing. Pin.
Step 3: Sewing The Zipper Area
Step 4: Cutting to Prepare For Inserting Zipper
Step 5: Turning The Fabric
Flip one side right side out through the hole you just created, and press carefully around the rectangles edges.
Now, measure your zipper against the opening in your fabric. It should be just a bit long.
Sew across the teeth of your zipper (several times) just past where it will be hidden from sight. Cut off that metal piece. You probably want the zipper to have about an extra 1/2″ or so on the end for inserting. I used a metal zipper and I just hand-wheeled it through back and forth several times so I wouldn't break my needle.
Step 7: Inserting The Zipper
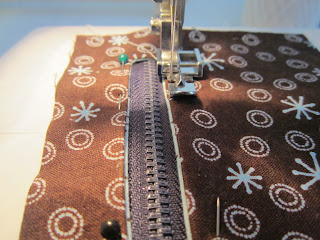
Pin and sew the zipper in place (using a zipper foot). Sew close to the edge of the fabric (less than 1/8″).
Step 8: Preparing To Finish The Zipper Pocket
Take 2 more Secondary Color 8.5″ x 4.5″ pieces and place them wrong sides together. These will be the inside of your zipper pocket, and the inside of the slip pocket. Pin these pieces (wrong sides together) onto the outside of the zipper pocket (so the zipper is facing these new pieces).
Pin all the edges of the the pocket. Top stitch along the top edge and baste together the other three sides using about 1/4" seam allowance. Your zipper pocket is ready!
Step 10: Starting On The Credit Card Pouches
Take 2 more Secondary Color 8.5″ x 4.5″ pieces. Place them right sides together and pin. Sew the top edge only using a 3/8″ seam allowance.
Flip so the seam is hidden, press the seam. Topstitch about 1/8″ from the folded edge. This will be your bottom pocket.
Step 11: Preparing The Credit Card Pouches
Repeat for both other Secondary Color piece- 8.5 × 3.5 and Main Color Piece 8.5 × 3.
Step 12: Pinning The Pouches Together
Line the largest 2 pockets up & pin. Make sure the top edges are parallel- this is more important than the bottom edges being exact.
Draw a line in pencil 2.5″ from the top edge. Stitch over your line (this will be hidden from sight).
Step 13: More Pinning!
Step 14: Marking The Middle
Place the smallest piece on top. Pin all together, and baste the 3 unfinished edges using 1/4″ seam allowance.
Find the middle of your pockets (width-wise) and lightly mark points in pencil along that line. This will divide the pockets for credit cards. Make sure you get it in the middle or your cards may not fit well on one side.
Step 15: Stitching The Middle
Topstitch neatly over this middle line and tie off the ends nicely.
Step 16: Stitching Pockets To The Inside
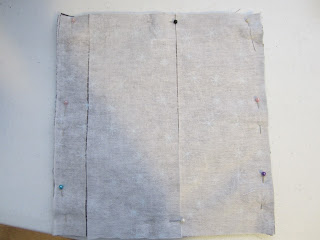
Take a Main Color 8.5" x 9" piece and place interfacing on the wrong side. Place both your credit card slots and zippered pouches on top of the 8.5″ x 9″ piece. Pin together, baste all around the edges using 1/4″ seam allowance.
Step 17: Preparing The Snap/Velcro Tab
Place your two 2.5″ x 5″ pieces right sides together and pin.
Step 18: Stitching The Tab
Stitch around the outside using 1/4″ seam allowance. Leave one end open. Make sure to backstitch at the corners so they are strong for flipping.
Clip the corners and trim the seam allowances. Flip right-side out and press. Topstitch on the three sides with seams about 1/8″ from the edge.
Make marks for inserting your snap about 1″ from the edge of your finished tab. Follow the manufacturer’s instructions for inserting your snap. Or... use velcro like I did.
Take your Main Color 8.5 × 9 piece and put interfacing on the wrong side, and make a mark in the middle about 1.5″ from the top edge (one of the 8.5″ sides). Again, follow the manufacturer’s instructions for inserting the other side of the snap.
Step 19: Pinning The Wallet Together
Place the inside and outside pieces right sides together and pin. Make sure the snap edge of the outer piece matches up with the card slots on the inner piece. Leave the opposite end (with the zippered pocket) open for flipping. (My picture looks kind of funny because my interfacing was in three pieces. I was using up scraps)
Step 20: Stitching The Wallet
Stitch all around using a 1/2″ seam allowance. Use a small stitch for strength. Backstitch at the corners for extra strength (they are very hard to flip).
Cut your corners and trim the seam allowances (except on open edge).
Step 21: Stitch On The Tab
Flip the whole thing right side out and press it well. Insert the snap tab in the opening and pin in place. Make sure it closes correctly before stitching.
Topstitch all the way around, staying close to the edge. This takes time and patience. In the places with lots of layers, you may need to wheel it by hand to get through the layers. Be especially careful around the corners and the ends of the zipper pocket.
All Done! Fill it up and enjoy!


No comments:
Post a Comment