Thursday, December 12, 2013

11 Awesome Crockpot Recipes

I love using the crock pot for dinner. It's great to throw some ingredients into the crock pot in the morning and not have to worry about dinner later on when I'm exhausted from the day. I'm sure you know how that is. These are my favorite crock pot recipes. Several of them I've probably found through Pinterest. I thought it was time to share them with all of you exciting people! : ) I have a small family and even though these recipes make a lot for a small family. We find these recipes to work well for our family since these recipes either freeze well or make great leftovers! So here they are, have at it!

Crockpot Creamy Chicken and Broccoli Over Rice
4-6 servings
* 3-4 boneless chicken breasts
*1 10 oz can cream of chicken soup
* 1 10 oz can cheddar soup
* 1 14 oz can chicken broth
* 1/2 tsp salt
* 1/4 tsp garlic salt
* 1 cup sour cream
* 6 cups broccoli florets, just fork tender (boil for 3-4 minutes)
* 1 cup shredded cheddar cheese

1. Place soups, chicken broth, salt, garlic salt, and sour cream into crockpot and whisk until smooth. Place chicken in. Cover lid and cook on low for 6-8 hours.

2. When chicken is cooked, shred using 2 forks. Stir in broccoli.

3. Serve over steamed rice and sprinkle with cheese.

                          Crockpot Chicken Enchilada Soup
 

* 1 15-ounce can black beans, rinsed and drained
* 1 14.5-ounce can diced tomatoes
* 1 10-ounce package frozen whole kernel corn 
* ½ cup chopped onion
* ½ cup chopped green pepper
* 1 10-ounce can enchilada sauce (I used mild)
* 1 10.75-ounce can condensed cream of chicken soup
* 1½ cups milk 
* 1 cup shredded Pepper jack cheese (4 ounces)
* 2 chicken breasts

1. In a crockpot, combine drained beans, tomatoes, corn, onion, and bell pepper. Place 2 chicken breasts on top of mixture.

2. In a large bowl, whisk together enchilada sauce and soup. Gradually whisk in milk until smooth. Pour sauce mixture over ingredients in crockpot. Cover and cook on low for 6-8 hours.

3. Remove chicken and shred into bite size pieces. Add chicken back into soup.

4. Top with pepper jack cheese and serve. 

*Can also be topped with avocado, sour cream or crushed tortilla chips. 
* I use one can of chicken instead of chicken breasts and cook it for 4-6 hours instead of 6-8 on low.
* I also make these Homemade Tortilla Chips to eat with the soup.

                      Crockpot Ranch House Pork Chops 


6 pork chops, thinly sliced
1 pkg dry Hidden Valley Ranch salad and seasoning mix
1 can (10 3/4 oz) cream of chicken soup

1. Combine soup and ranch mix in crockpot. Mix well.
2. Place pork chops on top of mixture and cook on low for 4-6 hours.
3. Serve with mashed potatoes. The soup/ranch mixture makes a good gravy or you could have gravy with it.

* I use 3 pork chops and 2 cans of cream of chicken soup instead and it works well for our family. I also use frozen pork chops and cook on low for the same amount of time.

                             Slow Cooker Mongolian Beef

1 lb beef flank steak, cut into stir fry sized strips
1/4 cup cornstarch
2 TBSP olive oil
1/2 tsp ginger, minced
3/4 cup soy sauce
3/4 cup water
3/4 cup brown sugar
1/2 cup shredded carrots
3 medium green onions, chopped

1.Spray slow cooker with non-stick cooking spray. 
2. Place cornstarch in a bowl. Coat each piece of steak in cornstarch and place in crock pot. 
3. Discard any remaining cornstarch. 
4. Combine remaining ingredients in a bowl and pour over beef in crock pot. 
5. Cook in crockpot on high for 2-3 hours or low for 4-5 hours. 
6. Serve over rice, topped with additional sliced green onions.

                                                    Crockpot Lasagna Soup

1 lb ground beef, cooked
3 cups beef broth
1 cup water
4-5 cloves of garlic, minced
1 TBSP dried parsley
1 TBSP dried basil
1/2 cup onion, chopped
1 (28 oz) can diced tomatoes
1 (6 oz) can tomato paste
1 cup V8
2 cups uncooked shell pasta
1/4 tsp pepper
1/4 tsp salt
optional: shredded cheese for topping

1. First mix together the can of tomatoes, and tomato paste in crockpot.
2. Next add broth, beef, garlic, parsley, basil, onion, V8 and salt/pepper.
3. Cover and cook on LOW for 7-8 hours or on HIGH for 4-5 hours.
4. When 30 minutes are left of cook time, add in the 1 cup of water and noodles. Stir to combine. Put lid back on and continue cooking for 30 minutes.

                      Slow Cooker Cheesy Chicken and Rice
 4 boneless skinless chicken breasts
1 large onion, chopped
1 (8 oz) box Zatarain's Yellow Rice Mix, cooked according to package directions
1 cup shredded cheese
1 (10 3/4 oz) cream of chicken soup
1 (15 oz) can whole kernel corn, drained

1. Place chicken in bottom of slow cooker. 
2. Scatter chopped onion over top. 
3. Spoon cream soup over top of that. 
4. Cover and cook on low 7-8 hours or on high 3-4 hours. 
5.  A few minutes before serving, add in cooked rice, corn, and cheese. 
5. Stir to combine. 
6. Serve hot.

                        Creamy Slow Cooker Tortellini Soup

1-1 1/2 - 2 ounce envelope white sauce mix
4 cups water
1-14 ounce can vegetable broth
1 1/2 cups sliced fresh mushrooms
1/2 cup chopped onion
3 cloves garlic, minced
1/2 teaspoon dried basil, crushed
1/4 teaspoon salt
1/4 teaspoon dried oregano, crushed
1/8 teaspoon cayenne pepper
1- 7 or 8 ounce package dried cheese tortellini (about 2 cups)
1-12 ounce can evaporated milk
6 cups fresh baby spinach leaves or torn spinach
Ground black pepper (optional)
Finely shredded Parmesan cheese (optional)


 1.Place dry white sauce mix in a 3-1/2- or 4-quart slow cooker. Gradually add the water to the white sauce mix, stirring until smooth. Stir in broth, mushrooms, onion, garlic, basil, salt, oregano, and cayenne pepper.

2.Cover and cook on low-heat setting for 5 to 6 hours or on high-heat setting for 2-1/2 to 3 hours.

3.Stir in dried tortellini. Cover and cook on low-heat setting for 1 hour more or high-heat setting for 45 minutes more.

4.Stir in evaporated milk and fresh spinach. If desired, sprinkle individual servings with black pepper and Parmesan cheese. Makes 4 servings.


                         Crockpot White Chicken Chili 
2 cans chicken, drained
1 medium onion, chopped
2 garlic cloves, minced
2 cans chicken broth
1 can (4 oz) chopped green chilies
2 tsp ground cumin
2 tsp dried oregano 
1 tsp cayenne pepper
3 cans great northern beans, drained, divided
1 cup shredded cheese

1. Add canned chicken, onion, garlic, broth, chilies, cumin, oregano, and cayenne to crockpot and mix well.
2. With a potato masher, mash one can of beans until smooth.
3. Add mashed beans and remaining beans to crockpot.
4. Cook on low 3-4 hours.
5. Top with cheese.

*I recommend using a little less cayenne pepper, it was a bit spicy for me.

                                           Crockpot Chili

1 lb ground beef, browned and crumbled
1 stalk celery, finely chopped
1 onion, chopped
1 1/2 TBSP chili powder
1 tsp cumin
1/2 TBSP garlic, minced
1 (15 oz) can petite diced tomatoes
1 (15 oz) can tomato sauce
1 (15 oz) can dark red kidney beans
1 (15 oz) can beef broth (or water)
1 tsp Worchestershire sauce
salt and pepper to taste
*optional toppings: shredded cheese and sour cream

1. Place ground beef into crockpot.
2. Open cans of tomatoes, tomato sauce and kidney beans (do not rinse or drain), beef broth, celery and onion and dump those into the crockpot.
3. Add chili powder, cumin, Worchestershire sauce and mix thoroughly.
4. Add salt and pepper to taste.
5. Cover with lid and cook on low for 4-6 hours (the longer, the better)
6. Serve with toppings.

               Crockpot Corndog and Bean Casserole
6-7 hotdogs, sliced thin
1 (16 oz) can baked beans
1 package Jiffy corn bread mix

1. Add baked beans and hot dogs into crockpot, mix together.
2. Cook on low for 1 1/2 hours until liquid is starting to bubble.
3. In a small bowl, mix corn bread mix according to package.
4. Add a layer of corn bread mixture on top of the baked beans and hot dogs.
5. Put lid back on crockpot for an additional 30 minutes or until the corn bread is firm to the touch.
6. Serve.

                        Crockpot Augratin Potatoes
8 large potatoes, peeled, sliced
1 1/2 cups shredded cheese
2 cans cream of chicken soup
1 (16 oz) container sour cream
1/2 cup onion, chopped
1/4 cup butter, melted

1. Mix all ingredients, except cheese and place into crockpot.
2. Cover and cook on low for 6-8 hours, stir often while cooking.
3. Put in cheese in last 30 minutes of cooking.
4. Serve.

Friday, December 6, 2013

Beef Stroganoff

I happened to find this recipe online through Pinterest and decided to try it. I'm always looking for more recipes to add variety to our meals. When I found this recipe, I quickly read through it, mainly looking at the ingredients to determine if it would be a budget friendly recipe and sounded appetizing.

After deciding that it could be a great budget friendly, yummy and easy recipe I quickly pinned it and moved on to pinning other things. Later I had remembered finding the recipe and made sure I had all the ingredients on hand to make it for dinner. As I went to make it for dinner, I suddenly read that you were supposed to let it simmer on medium high heat for 1 1/2 hours, then add more ingredients and cook for an additional 45 minutes. I thought, "Ha! Whatever, that's totally unnecessary" and decided I would just simmer it for 30 minutes before adding the remaining ingredients and set the timer as it started to simmer. Within ten minutes all the liquid had cooked out or evaporated and the food was starting to stick to the bottom of the pan. I then decided to forget the rest of the 20 minutes of simmering and add the next step of ingredients. It turned out okay but it wasn't much of a sauce, so I added another 1/2 a cup of sour cream and 1 cup of milk. Voila! I cooked it for a couple more minutes and served it over cooked egg noodles. It was very good! My husband even liked it and he usually doesn't like beef stroganoff at all and was quite surprised it like it the recipe. So for the first time in my life I was able to modify a recipe and find it edible and even delicious! I was soo proud of myself! Anyways, here's the modified recipe so you can make it too. Picture below is from original recipe post online.

1 lb ground beef
1/2 cup chopped onion
1 clove garlic, minced
1 can mushrooms (4 oz), drained
1 cup sour cream
1 cup flour
3 TBSP flour
1 cup water
1/8 tsp pepper
1/8 tsp salt
wide egg noodles

1. Brown ground beef in skillet and drain fat.
2. Add onion, and garlic and continue to cook until onion starts to brown.
3. Add mushrooms and water, stir.
4. Cover and cook, let simmer medium heat until liquid is cooked in.
5. Add sour cream, flour, and milk, stir, cover and let simmer for 5-10 minutes.
6. Boil noodles according to package directions and serve sauce over noodles. Enjoy!

Thursday, November 21, 2013

2 Dessert Recipes Perfect for Thanksgiving

I don't know how to bake pies... at all. No clue! This is my way of cheating that process and still enjoy 2 Thanksgiving favorites. 

Lemon Lush tastes just like Lemon Meringue pie in my humble opinion and Pumpkin Dessert tastes like Pumpkin Pie. 

Lemon Lush
1 (8 oz) container Cool Whip
3 cups milk
2 (3 1/2 oz) packages instant lemon pudding
2 (8 oz) packages cream cheese, softened
1 cup flour
1/2 cup butter, melted

1. Mix and spread the butter and flour in bottom of 13 x 9 x 2 dish. Flatten out. Bake at 350 degrees for 20 minutes. Cool.
2. Combine powdered sugar, cream cheese, and 2 cups of the cool whip until well mixed. Spread over crust.
3. Mix lemon pudding and milk. Spread over cream cheese mixture. Chill.
4. Serve with remaining cool whip.

Store leftovers in the fridge.

Pumpkin Dessert

Cake Layer
1 pkg yellow cake mix (save 1 cup dry mix for top)
1/2 cup melted butter
1 egg beaten

Mix and pour into a greased 9 x 13" pan

Pumpkin Pie Layer
3 cups canned pumpkin
2 eggs
2 1/2 tsp pumpkin pie spice
1/2 cup brown sugar
2/3 cup milk

Mix together and spread on top of first layer

Crumble Top Layer
1 cup reserved cake mix
1/4 cup sugar
1 tsp cinnamon
1/4 cup melted butter

Mix together and sprinkle on top. Bake at 350 degrees for 35 minutes.

Store leftovers in the fridge.

Wednesday, November 13, 2013

How to Make Foaming Hand Soap!

Want to save money? Make your own foaming hand soap! I have a 3 1/2 year old that tends to waste a lot of hand soap when washing her hands and since we've been potty training, that is a lot of hand soap (and money) being wasted every day.

Anyways, lets get started!

First, you will need:
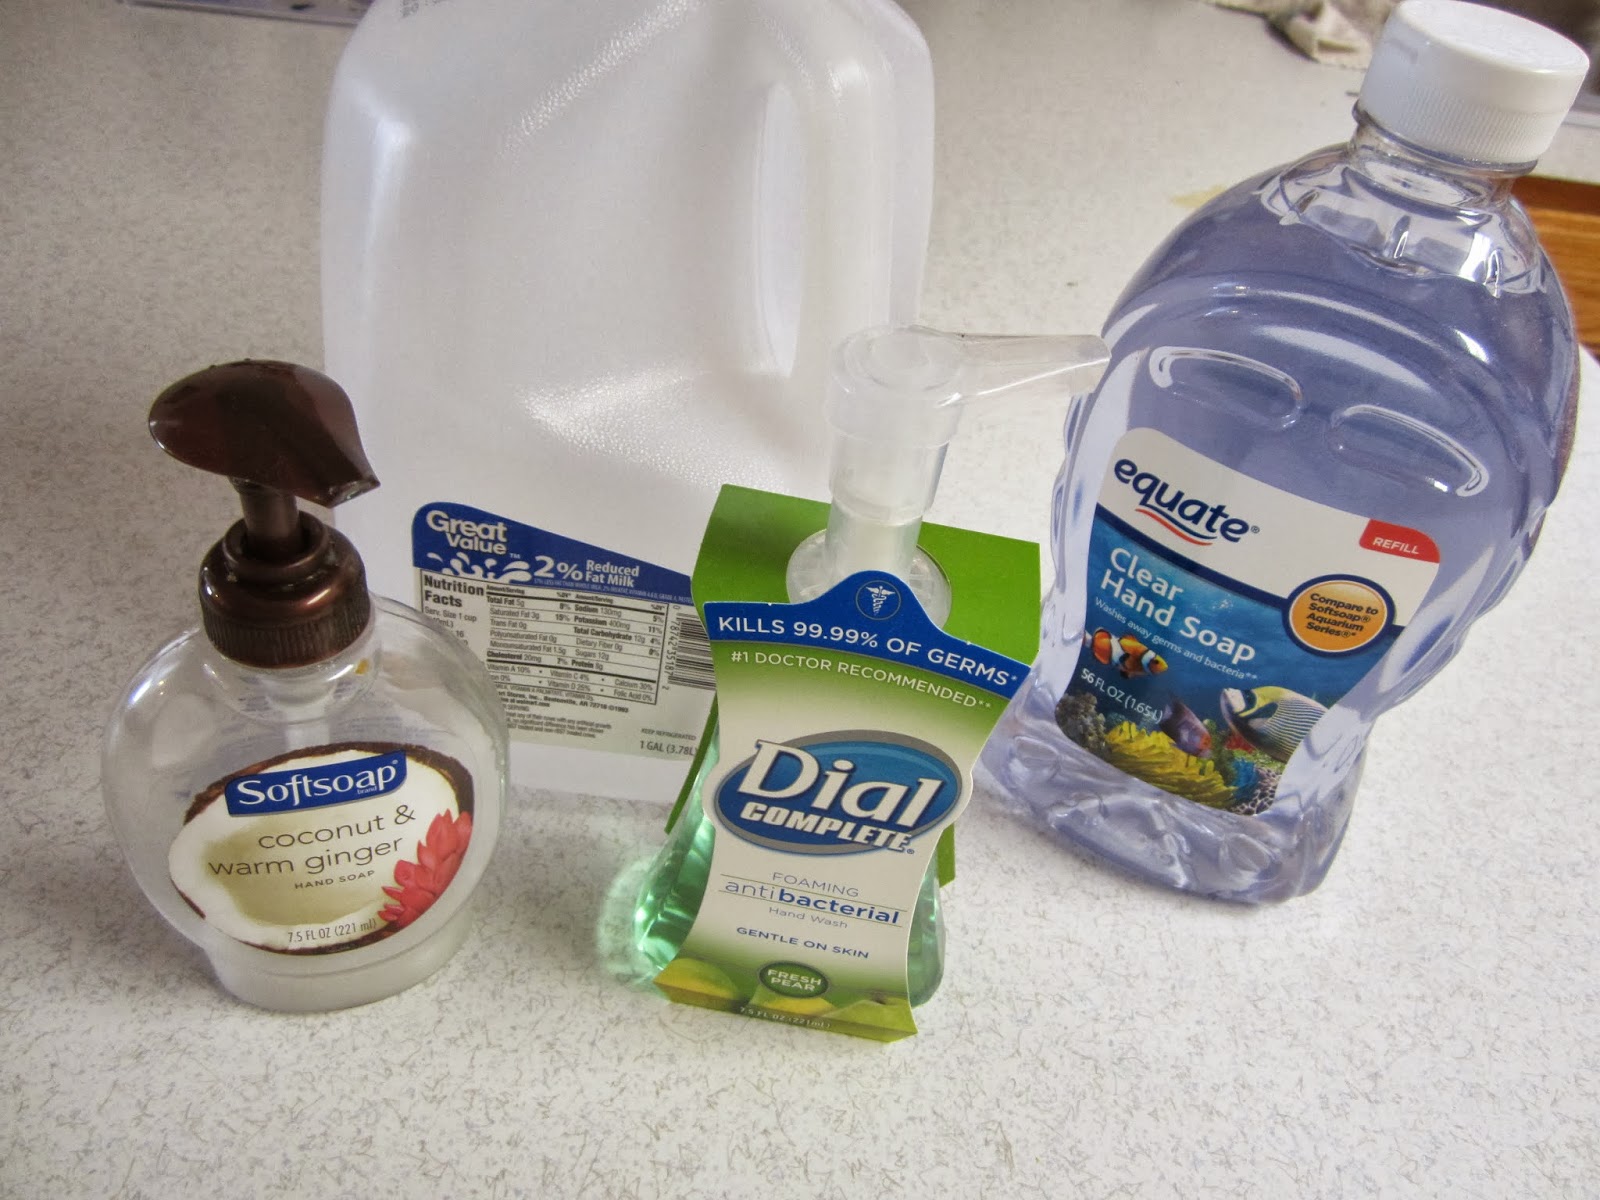
* foaming hand soap dispenser (Yes it has to be a foaming one!)
* clear hand soap refill
* 7.5 fl oz hand soap dispenser
* water
* liquid measuring cup
* clean, empty gallon milk jug


Pour 5 cups of water into the milk jug.
 Fill up the 7.5 fl oz hand soap dispenser with the clear hand soap from the refill bottle and pour it into the milk jug. I just let it sit upside down on the milk jug for a couple minutes to let it empty completely.
 You can do this twice and it will fit in the milk jug. Even after doing this twice, I still had 75% of soap in the refill bottle to make more later. I think I spent about $2 on the foaming soap dispenser and about $4 on the refill soap bottle. That's even cheaper than just refilling the 7.5 fl oz soap dispenser with the soap refill container.


Now it's your turn to make your own foaming hand soap and start saving money! Go for it!

Wednesday, November 6, 2013

C Section Preparation and Recovery

When I had my daughter in 2010 it had never occurred to me that I may have to have a C Section. I didn't experience any complications during pregnancy, I wasn't having multiples and I was completely unaware that there were other reasons that you could end up having a C Section.

What is my point? In some ways you should prepare yourself for a C Section in case it comes to it. A lot of ways that you can do this is not much different than preparing for a vaginal birth. For instance, you should make sure to pack the following items in your hospital bag:

1. Boppy Pillow. This is a life saver after a C Section because it helps you hold the baby off and
away from your incision when breast feeding.

2. Comfortable clothes to go home in. This can be a skirt and shirt, high wasted pants and a shirt, etc. Your incision will be in the same general area that the elastic rests on your waist on maternity pants and you definitely don't want anything on your incision, especially when sitting in a car on the way home.

3. Disposable underwear or high wasted underwear. The mesh underwear that the hospital gives you can get stuck on the adhesive that is on your skin around your incision. Ouch! Cotton high wasted underwear is what I prefer because the pads stay put unlike any disposable underwear.

Other ways to be prepared for a C Section even when expecting a vaginal birth:

Have a rocking chair or glider chair. After a C Section you are unable to use your stomach muscles and may not be able to get out of bed by yourself if your bed frame doesn't provide something to grab to pull yourself up. Therefore, this will be a great alternative for sleeping. You'll want a rocking chair that has arm rests and that is not too soft or cushy for support when sitting or when getting up. I have found it very helpful to have one that also comes with a foot rest. My feet and ankles swell a lot after a c section and I put a pillow on the foot rest to elevate my feet. (the swelling is due to all the fluids they give you in the IV and pitocin that they give to you to help your uterus return to size.)


  What to Expect During a C Section
1. You will be laying on a table with your arms out stretched and away from you and strapped down to prevent you from moving and to give the anesthesiologist easy/quick access to your arms and IV.
2. They will put a sheet up close in front of you to shield you from seeing what the doctors are doing.
3. You will have an IV in and a catheter and possibly oxygen.
4. You may experience nausea and may even throw up, shake uncontrollably, feel itchy or may have an allergic reaction to anything they use, the anesthesiologist can give you medication to combat these side affects. 
5. You should not experience any pain but you will feel tugging, pulling and pressure.
6. The doctor should get your baby out within the first 5 mins and the last 40 minutes will be them finishing the surgery, so expect to hear your baby cry soon after they start.
7. You will be in the recovery room for at least an hour afterward before being taken to your room.


After the C Section and Recovery

Breastfeeding - C Section moms' milk may take a few more days than usual to come in. You should not be concerned about this because your baby should still be getting plenty to eat. But you should seek help from a lactation consultant if you feel it is necessary or that your baby isn't getting enough.

Visitors - Take time to bond with your baby and have visitors come later so that you and your husband have time to bond as a new family and have privacy. You will still have plenty of hospital staff coming in. Also, after waiting about 2 hours (surgery time and time spent in the recovery room) to see or hold your baby for the first time, you need time to enjoy your baby before sharing your baby with friends and family. This will also give you the much needed time to start to heal and get adjusted.

Walking - the hospital staff will have you up and walking soon after. Moving around and walking promotes proper healing. It helps with circulation to prevent blood clots, helps relieve gas (since your digestive system will be struggling), and keeps your bowels functioning, gives you energy and helps you sleep.

Avoid walking up and down stairs - “I try and limit the amount of stairs patients do for the first week, as it can be very difficult for some to go up and down steps,” says Dr. Robert Atlas, an OB-GYN at Mercy Medical Center in Baltimore. “Steps can put quite a bit of pressure and strain to the muscles in the lower abdomen.”

Constipation - The narcotics for pain relief can cause severe constipation and your digestion system will be struggling because of the surgery. Make sure you are well hydrated, eat plenty of fiber, take your stool softeners that your doctor will prescribe and avoid eating foods that create gas such as broccoli, beans, etc.

Pain Medications - Make sure you stay on top of your medications. When I was recovering from my last C Section I was strongly advised to slightly overlap my medications so I won't have pain between the medication wearing off and the next dose kicking in. Also.... make sure you wean yourself off your medication gently. Some of those medications can be a beast to wean yourself off of.

Belly Binder - If you know you are going to have a C Section. Invest in a Belly Binder. Belly binders support your abdomen during healing and helps when coughing, laughing or sneezing. These are also supposed to help you lose the weight faster. I purchased mine from Target.com for approximately $35 (including shipping). It had lots of great reviews and really made a huge difference for me and helped me be more independent without hurting myself. It really provided extra support to my abdomen and I wish I could have had it with my first C Section.

Examine your incision often - Its important to look at your incision so that you can recognize any changes that may indicate infection or other problems.

Don't expect the incision to feel "better" as you heal - You will go through phases of pain, numbness, itchiness, soreness, etc even after several years. Plus, within the few weeks you may notice that you feel worse before you start to actually feel better and struggle less to get up and down and experience pain.

Experiencing grief or depression because of failure to birth your baby vaginally. A lot of moms experience depression because they feel less of a mom or feel cheated out of being able to bond with their baby when it is born. Take time to grieve. Don't let anyone tell you that you shouldn't be upset about having a c section. Moms that haven't experienced a c section may have the attitude that you had it easy and do not understand the lack of bonding time you experience with your baby, the fact that you probably went through a very long labor, the severe pain you have, the side affects of the surgery, etc. Take time to accept your experiences and that if you have to have c sections, there can be advantages to it and let go of the disadvantages. I like to think I'm a stronger person than before because of the experiences I have endured.


Monday, October 21, 2013

Easy Table Runner Tutorial

I learned how to make this table runner at a Relief Society Fun Friday Craft Activity. I also found the tutorial on a flyer at Joann Fabrics in Logan that had the website address to make this same table runner (10 Minute Table Runner).


You will need:
* 1/2 yard fabric
* 1/3 yard contrasting fabric

1. Place the two pieces of fabric together (right sides together).
2. Sew down both long sides with 1/4" seam allowance.
3. Now you have a long tube. Lay flat and press so the contrasting fabric is bordered evenly on long sides with other fabric.
4. Iron seam flat. Trim short ends even.
5. Flip inside out and fold in half lengthwise with contrasting fabric out. Stitch 1/4" seam on both short ends.
6. Press seams open. Turn seams inside to form a point, press.
7. Sew on decorative button at the edge of point to secure in place.

NOTES: I have a strip in the middle of the one pictured because I didn't quite have enough contrasting fabric so I improvised by adding the small piece. I also didn't use large buttons like you are supposed to because I just used whatever I had. I strongly suggest you use large buttons. The finished size from point to point and side to side is: 56" x 13 1/2".

Thursday, June 13, 2013

Swedish Meatballs

This is one of my favorite recipes! Its quick and easy and it doesn't make an overwhelming amount for my small family. Anyways, here it is:

1 bag frozen Great Value meatballs (you don't use the whole bag, just whatever amount you want to use of the bag.)
1 10 3/4 oz cream of mushroom soup
1/2 cup sour cream
1/4 cup milk
1/4 tsp nutmeg
1 TBSP parsley flakes
hot cooked noodles (I use wide egg noodles)

Cook the noodles according to the package directions. I used a half of a package and it was plenty of noodles. Meanwhile, mix the soup, sour cream, milk, nutmeg and parsley and meatballs and heat thoroughly over medium heat. Don't thaw meatballs before, just place them in the sauce mixture frozen. Once sauce and meatballs are heated through and noodles are cooked. Serve sauce and meatballs over noodles. Garnish with extra parsley.

Monday, April 22, 2013

Homemade Laundry Detergent - Cheap and Easy!

I'm sorry I haven't blogged in quite a while. I am almost 12 weeks pregnant and just starting to get my energy back. I hope to blog more often.

 I have been making my own laundry detergent for a couple months now. It has saved us a lot of money. I've never done the exact math on it and even if I did it probably wouldn't be accurate. Lol Math is not one of my strengths I'm afraid, but I do notice the difference of not having to buying laundry detergent often like before. We used to buy Tide Orignal Scent for approximately $20.

My husband has very sensitive skin and we have only been able to use Tide Original scent and nothing else but dryer sheets that are the original scent. This homemade laundry detergent works very well even with clothes that are soiled from potty training.  My husband loves this laundry detergent and has never had an issue with his sensitive skin.

So anyways lets get to the directions so you can make it yourself!

You will need:
1 cup  Borax
1 cup  Washing Soda (do not confuse this with baking soda, they are NOT the same)
1 bar   Fels Naptha (in the laundry section)
1 cheese grater or food processor
1 container of your choice


Take the Fels Naptha bar and finely grate it into your container or use a food processor to turn it into a powder. Turning it into powder is best. I just bought a cheese grater from Dollar Tree since I didn't have the funds for a food processor at the time. If you do get a cheese grater make sure it will finely grate it.


Now mix the borax and washing soda into the container and put the lid on the container and shake it or stir it well.

                                                                           All done!

To use you will need a 1 tablespoon measuring spoon.

Small load - 1 Tablespoon
Medium load - 2 Tablespoons
Large load - 3 Tablespoons

Don't expect this laundry detergent to create bubbles when adding it to the water, it doesn't do that.


Wednesday, March 6, 2013

Toilet Paper Holder Tutorial

 I found this idea on Pinterest but the pin led to an etsy shop that was selling them for $45!!! which I personally think is outrageous to pay for such an item. It took me a while but I figured out how to make my own.

The picture actually doesn't do it justice. Its cream colored with a small pattern. It's easy to make and doesn't take very long. Enjoy!

Step 1: Cut Out Fabric

2 - 33.5" x 6" pieces
4 - 1 1/4" x 8.5" pieces    (you may want to make this longer, depending on how you want it to tie)
                                                                                                                                                    

Step 2: Sewing the Holder


 Take both 33.5" x 6" pieces and put them, right sides together. Pin along the long sides.

                                        Sew down the pinned long sides with a 1/4" seam.

                        Turn it inside out so the right sides are on the outside and iron flat.
                                               (this hides your edges on the inside.)

Fold it in half and pin along the top. Measure 7.5" and 8" from the bottom, mark across and sew. You should end up with two sew lines. This picture may not show it well.

                          At the top, fold in both edges by 1/2" as shown in the picture and re-pin.

Step 3: Sewing the Ties
 Take one tie and fold it in half from the right, then fold it in half from the left. Pin all the way down.


Sew down on the left and right side, keeping close to the edge. Repeat with other ties.

Next pin the straps in place by placing the ties in between the two main pieces at the top and sew along the edge with about 1/8" seam.


 I also sewed across the tips of the ties to keep it from fraying. Not sure if it's actually necessary but it's but to you.

                                                                    Tadaa! All done!


Monday, February 25, 2013

Crock Pot Chicken Enchilada Soup & Tortilla Chips

This is an awesome soup that I found on Pinterest (of course) and I just had to put it on here to spread the word! I also got the homemade tortilla chips instructions on Pinterest. It makes a lot (for 3 people) so I end up freezing the rest and then just making more chips that day. My husband LOVES the nights that I make this soup! Try it! This meal costs $8.26 if you shop at Walmart and buy the Great Value brand when possible. Since I freeze the leftovers, it is $4.13 to feed three people each time. Cheap meal!

1 15 oz can black beans, rinsed and drained
1 14.5 oz can diced tomatoes
1 can corn
1/2 cup onion, chopped (I always use onion powder instead of onion because I hate onions)
1/2 cup green pepper, chopp
1 10 oz can mild enchilada sauce
1 10.75 oz can condensed cream of chicken soup
1 1/2 cups milk
1 cup pepper jack cheese (4 oz), I use the slices
1 can chicken, shredded

In large crockpot, combine drained beans, tomatoes, corn, onion,  bell pepper and chicken. Stir it all together well. In a bowl, combine enchilada sauce and soup. Stir well and then stir in milk until smooth. Pour sauce mixture in crock pot. Stir well.

Put on low for for 4-5 hours. Top with pepper jack cheese right before serving. Top with sour cream, avocado, etc. If soup is too thick for you just add a little more milk. I never have to.

HOMEMADE TORTILLA CHIPS

Preheat oven to 400 degrees. lay the tortillas out on a cutting board, spray with nonstick oil spray on both sides. If you want to season them. You can season them with paprika, salt, paprika, chili powder, cayenne pepper, garlic salt, etc. I don't season mine. Season them on both sides if desired.

Stack the tortillas in piles. Using a sharp knife or pizza cutter, cut through the pile of tortillas, cutting into triangles.

Arrange tortilla triangles (single layer) on a baking sheet. Bake 6-7 minutes or until they start to curl and turn lightly brown. Watch them carefully! They can burn very quickly! Once the chips are done. remove from oven to cool. They will continue to crisp as they cool.


Friday, February 22, 2013

Cute Wallet Tutorial

 I just made this wallet because the one I was using was getting holes in it and the zipper barely worked. I made a purse that is of the same material too. Anyways I thought I'd share the tutorial with you. I found this tutorial at BurdaStyle. I find it a little difficult to decifer which pieces to cut out of the main color and the secondary color so I thought I'd include my own pictures with about the same instructions. Go check out the orginal tutorial for more info and pictures. Anyways.. here we go...

You will need:
* velcro or heavy duty snap and tools (I put velcro closure on mine)
* 2 fabric colors, about 1/2 yard total
* interfacing 1/4 yard
* 7" zipper
*zipperfoot

Step 1: Cut Out The Fabric Pieces

Step 2: Preparing The Zipper Area

Take one of the Main Color 8.5" x 4.5" pieces. On the wrong side, draw a line in pencil 1″ from the top. It should end 1″ from each edge. Draw an identical line 1/2″ below the first one, and connect them at the ends. This will be the square into which your zipper will be inserted.

 Place a Secondary Color  8.5″ x 4.5″ piece underneath the piece you just drew on, right sides facing. Pin.

Step 3: Sewing The Zipper Area


 Carefully sew around the box you drew using a small stitch length (I used 2). Make sure your corners are neat. Tie the ends off to ensure the thread will not come loose.

Step 4:  Cutting to Prepare For Inserting Zipper
 Cut down the middle of your rectangle to about 1/2 ” from each end. Then cut to each corner (as close as possible) creating a triangle at the end. Make sure this is neat.

Step 5: Turning The Fabric

 Flip one side right side out through the hole you just created, and press carefully around the rectangles edges.

 Step 6: Preparing The Zipper

Now, measure your zipper against the opening in your fabric. It should be just a bit long.
Sew across the teeth of your zipper (several times) just past where it will be hidden from sight. Cut off that metal piece. You probably want the zipper to have about an extra 1/2″ or so on the end for inserting. I used a metal zipper and I just hand-wheeled it through back and forth several times so I wouldn't break my needle.

Step 7: Inserting The Zipper
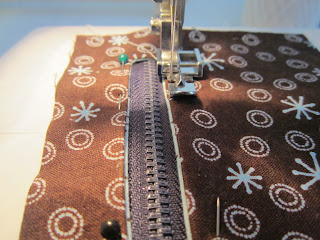
Pin and sew the zipper in place (using a zipper foot). Sew close to the edge of the fabric (less than 1/8″).

Step 8:  Preparing To Finish The Zipper Pocket


Take 2 more Secondary Color 8.5″ x 4.5″ pieces and place them wrong sides together. These will be the inside of your zipper pocket, and the inside of the slip pocket. Pin these pieces (wrong sides together) onto the outside of the zipper pocket (so the zipper is facing these new pieces).

 Step 9: Finishing The Zipper Pocket
 Stitch only the top edge together using a 3/8″ seam allowance and flip it over so the seam is hidden as shown and press well.

Pin all the edges of the the pocket. Top stitch along the top edge and baste together the other three sides using about 1/4" seam allowance. Your zipper pocket is ready!

Step 10: Starting On The Credit Card Pouches
Take 2 more Secondary Color 8.5″ x 4.5″ pieces. Place them right sides together and pin. Sew the top edge only using a 3/8″ seam allowance.

Flip so the seam is hidden, press the seam. Topstitch about 1/8″ from the folded edge. This will be your bottom pocket.


Step 11: Preparing The Credit Card Pouches

Take your Secondary Color 8.5″ x 4″ piece. Fold the top edge over 1/2″ and press. Topstitch about 1/8″ from the folded edge.

Repeat for both other Secondary Color piece- 8.5 × 3.5 and Main Color Piece 8.5 × 3.

Step 12:  Pinning The Pouches Together

Line the largest 2 pockets up & pin. Make sure the top edges are parallel- this is more important than the bottom edges being exact.
Draw a line in pencil 2.5″ from the top edge. Stitch over your line (this will be hidden from sight).

Step 13: More Pinning!

Do the same with the next piece, only draw your line 3″ from the top edge.

Step 14:  Marking The Middle

Place the smallest piece on top. Pin all together, and baste the 3 unfinished edges using 1/4″ seam allowance.
Find the middle of your pockets (width-wise) and lightly mark points in pencil along that line. This will divide the pockets for credit cards. Make sure you get it in the middle or your cards may not fit well on one side.

Step 15: Stitching The Middle

Topstitch neatly over this middle line and tie off the ends nicely.

Step 16: Stitching Pockets To The Inside

Take a Main Color 8.5" x 9" piece and place interfacing on the wrong side. Place both your credit card slots and zippered pouches on top of the 8.5″ x 9″ piece. Pin together, baste all around the edges using 1/4″ seam allowance.

Step 17:  Preparing The Snap/Velcro Tab

Place your two 2.5″ x 5″ pieces right sides together and pin.

Step 18:  Stitching The Tab

Stitch around the outside using 1/4″ seam allowance. Leave one end open. Make sure to backstitch at the corners so they are strong for flipping.

Clip the corners and trim the seam allowances. Flip right-side out and press. Topstitch on the three sides with seams about 1/8″ from the edge.

 Make marks for inserting your snap about 1″ from the edge of your finished tab. Follow the manufacturer’s instructions for inserting your snap. Or... use velcro like I did.

Take your Main Color 8.5 × 9 piece and put interfacing on the wrong side, and make a mark in the middle about 1.5″ from the top edge (one of the 8.5″ sides). Again, follow the manufacturer’s instructions for inserting the other side of the snap.

Step 19: Pinning The Wallet Together

Place the inside and outside pieces right sides together and pin. Make sure the snap edge of the outer piece matches up with the card slots on the inner piece. Leave the opposite end (with the zippered pocket) open for flipping. (My picture looks kind of funny because my interfacing was in three pieces. I was using up scraps)

Step 20:  Stitching The Wallet

Stitch all around using a 1/2″ seam allowance. Use a small stitch for strength. Backstitch at the corners for extra strength (they are very hard to flip).

Cut your corners and trim the seam allowances (except on open edge).

Step 21: Stitch On The Tab

Flip the whole thing right side out and press it well. Insert the snap tab in the opening and pin in place. Make sure it closes correctly before stitching.

 Topstitch all the way around, staying close to the edge. This takes time and patience. In the places with lots of layers, you may need to wheel it by hand to get through the layers. Be especially careful around the corners and the ends of the zipper pocket.

                                                        All Done! Fill it up and enjoy!